

Building my own raised garden boxes was a big moment for me. It let me control my outdoor space and feel proud of my garden. I want to help you do the same, whether you’re new to gardening or have experience.
In this guide, you’ll learn to make your own raised garden boxes. I’ll share my experience and tips on planning, materials, building, and caring for them. This will help you start your own garden project.
Key Takeaways
- Building raised garden boxes lets you customize your garden’s look and layout.
- DIY garden projects can save money and be very rewarding, like making custom garden beds.
- Raised garden boxes fit many garden styles and sizes, from small to big yards.
- With the right materials and planning, you can make a great garden with raised boxes.
- Custom garden beds can make the most of space, drainage, and sunlight for plants.
- Raised garden boxes are a fun and creative DIY project for all gardeners.
Why I Chose to Build Raised Garden Boxes
I love gardening and wanted a space that fits my needs. So, I built my own raised garden boxes. This choice improved my soil and drainage. It also helped my crops grow better and made gardening more fun.
I chose custom garden beds to use my yard space well. Raised garden boxes let me grow many plants in a small area. This way, I have a big garden in a small space.
Benefits of Custom Garden Boxes
Custom garden boxes offer many advantages:
- Improved soil quality and drainage
- Increased crop yields
- Space optimization, allowing for more plants in a smaller area
- Cost savings over pre-made options
Space Optimization in My Yard
Building my own raised garden boxes helped me fit my garden to my yard. It made my garden both useful and beautiful.
Cost Savings Over Pre-Made Options
Building my own garden beds saved me money too. I picked the materials and design myself. This way, I avoided the high costs of pre-made options.
Essential Planning Steps Before Construction
When planning your raised garden box, think about a few key things first. I learned this when starting my diy garden projects. First, decide on the size and spot for your boxes. Think about sunlight, water flow, and how easy it is to get to them.
A good garden box plan helps use your space well. It makes sure your plants get enough sunlight and water. Here are some important things to remember:
- Measure your space to pick the best box size
- Find a spot that gets the right sunlight for your plants
- Think about how water will flow and how easy it is to get to your boxes
Planning your raised garden box well helps make a garden that thrives. Don’t forget to think about what materials and tools you’ll need. Also, think about extra features like water systems or trellises.
With a good garden box plan, you’re on your way to a beautiful garden. It will make you happy and give you fresh food for a long time.
| Planning Step | Considerations |
|---|---|
| Size and Location | Measure available space, choose a location with adequate sunlight |
| Drainage and Accessibility | Consider drainage options, ensure easy access to garden boxes |
| Materials and Tools | Choose durable materials, gather necessary tools for construction |
Complete Materials List for Raised Garden Boxes DIY
Building your own raised garden boxes needs the right materials. You’ll need lumber, hardware, and fasteners for a successful project.
The lumber you choose depends on your box’s size and design. Use durable, weather-resistant wood like cedar or recycled plastic for the frame and bottom.
Lumber Selection and Quantities
- 2″ x 6″ or 2″ x 8″ lumber for the frame
- 1″ x 6″ or 1″ x 8″ lumber for the bottom
- Wood screws or nails for assembly
Hardware and Fasteners
You’ll also need hardware like corner brackets and screws. Choose durable, weather-resistant options.
Optional Materials for Enhanced Features
Consider adding optional materials for extra features. Irrigation systems or trellises can make your garden boxes more functional and beautiful.
| Material | Quantity | Purpose |
|---|---|---|
| Lumber | Varies | Frame and bottom of boxes |
| Hardware | Varies | Assembly and reinforcement |
| Fasteners | Varies | Securing lumber and hardware |
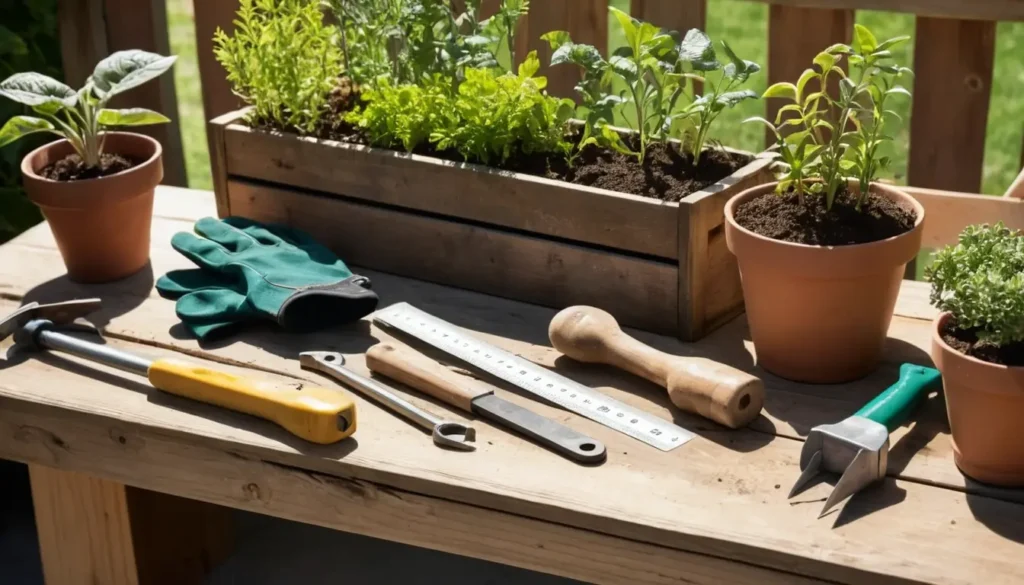
Tools You’ll Need for This Project
To start your diy garden projects, you need the right raised garden box tools. You’ll do lots of things like cutting, drilling, measuring, and assembling. Having the right tools makes your project better and faster.
You’ll need drills, saws, hammers, and tape measures. A miter saw or circular saw is great for precise cuts. Also, a sharp drill bit makes holes for screws easy.
For diy garden projects, like garden box construction, being organized is important. Keep your raised garden box tools in a toolbox or a special area. This keeps them handy and helps you focus on your project.
Here’s a list of tools you’ll need:
- Power tools: drill, saw, sander
- Hand tools: hammer, tape measure, level
- Measuring equipment: square, calipers
With these raised garden box tools and knowing their uses, you’re ready for your diy garden projects. You’ll work with confidence and precision.
Selecting the Perfect Location for Your Boxes
Choosing the right spot for your raised garden box is key. You need sunlight, good drainage, and easy access for upkeep. These factors help your diy garden projects thrive.
First, check how much sunlight your yard gets. Most plants need at least six hours of direct sun. If your yard lacks sunlight, think about using grow lights.
Next, look at the drainage. You don’t want waterlogged soil, which can harm your plants. Make sure the area slopes a bit to let water drain.
Accessibility is also important. Pick a spot close to water and easy to get to for upkeep. Think about the path to your garden boxes and any obstacles you might face. By carefully choosing, you’ll have a garden that’s both beautiful and productive.
Here are some more tips for picking a spot for your diy garden projects:
- Avoid areas with standing water or where water tends to collect
- Choose a location with good air circulation to prevent disease
- Consider the proximity to a fence or other structure that could provide support for climbing plants
By considering these tips and the factors that affect garden box placement, you can create a stunning and fruitful garden. It will give you fresh produce and a sense of pride.
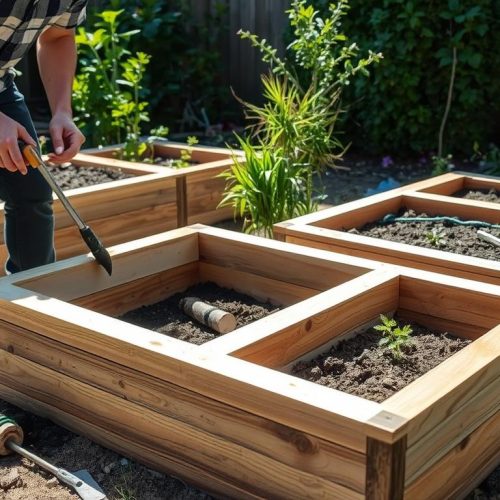
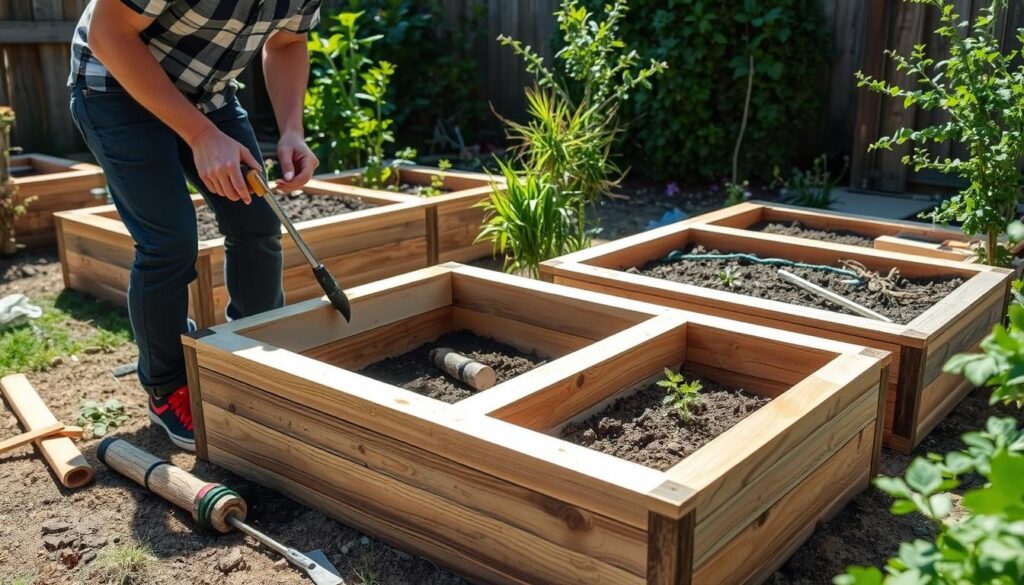
Building Process and Assembly Tips
Building a raised garden box is a big step in gardening. It’s important to plan well to make it work. Here, I’ll guide you through the steps to build and assemble your garden box. You’ll also get tips on how to do it right.
Box Construction Steps
The first thing is to cut and put together the lumber. You need to measure and cut the wood for your design. Then, use screws or nails to build the frame.
Don’t forget to add a bottom plate. This makes the box strong and lasts longer.
Adding Support Structures
Adding supports like corner posts or brackets is key. They keep the box stable, even with heavy soil and plants. This is very important for big boxes or those with heavy plants.
Installing Hardware
After building the box, install the hardware. This includes hinges and latches for easy access. Always follow the instructions and use the right screws or nails.
| Material | Quantity | Purpose |
|---|---|---|
| Lumber | 10 boards | Frame and support structures |
| Screws | 20 screws | Assembling the frame |
| Nails | 10 nails | Adding support structures |
By following these steps and tips, you can build a great raised garden box. Enjoy your thriving garden project.
Soil Mixture and Filling Methods
When it comes to raised garden box soil, the quality is key. A good mix drains well, is full of nutrients, and has the right pH. For my boxes, I chose a mix of topsoil, compost, and perlite. This combo offers great drainage and air for roots.
Filling your garden box is easy. Begin with a layer of landscape fabric to keep weeds and pests out. Next, fill it with your soil mix, leaving an inch at the top for water. Adding mulch helps keep moisture in and weeds down.
- Use a mix of soil types to create a balanced ecosystem
- Add organic matter like compost or manure to enrich the soil
- Avoid overfilling the box, as this can lead to waterlogging and root rot
By following these tips and using quality soil, your plants will thrive. This is true for your diy garden projects, in your raised garden box soil and garden box filling.
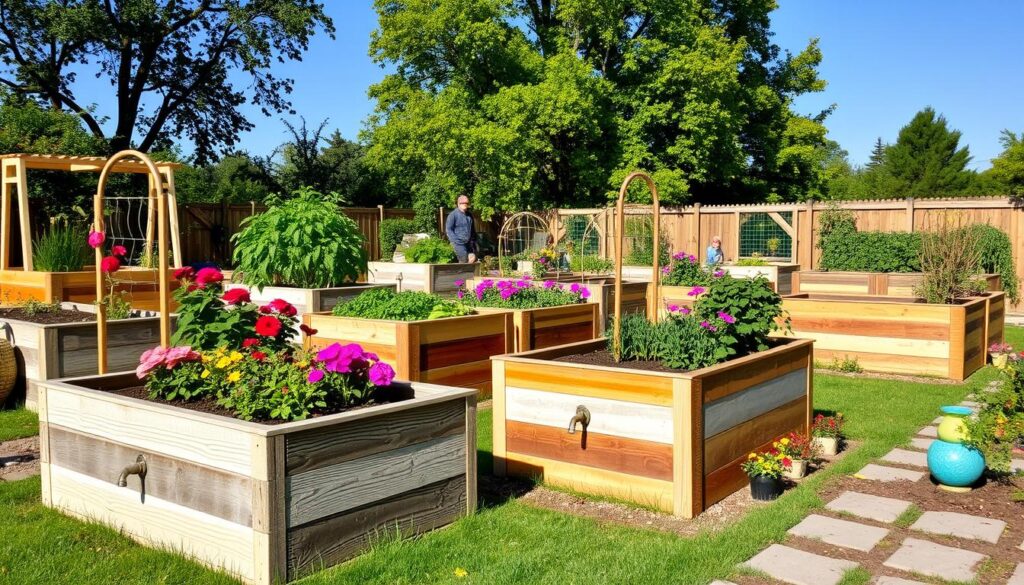
Adding Special Features to Your Garden Boxes
To make your raised garden boxes better, think about adding special features. One great idea is a garden box irrigation system. It makes watering easier and keeps your plants moist.
Adding an irrigation system is a bit tricky, but it’s worth it. You can use soaker hoses, drip irrigation, or sprinklers. These systems fit well in raised garden boxes, making watering easy.
Also, consider adding a trellis or support for your plants. This is great for plants like tomatoes and peas. These features help your garden grow better and look nicer.
- Pest protection options, such as fine mesh or row covers
- Trellis systems for climbing plants
- Self-watering systems for less upkeep
Adding these features to your diy garden projects makes your garden special. It meets your needs and looks great.
| Feature | Description |
|---|---|
| Irrigation System | A system for delivering water to plants, such as soaker hoses or drip irrigation |
| Trellis | A support structure for climbing plants, such as tomatoes or peas |
| Pest Protection | Options for protecting plants from pests, such as fine mesh or row covers |
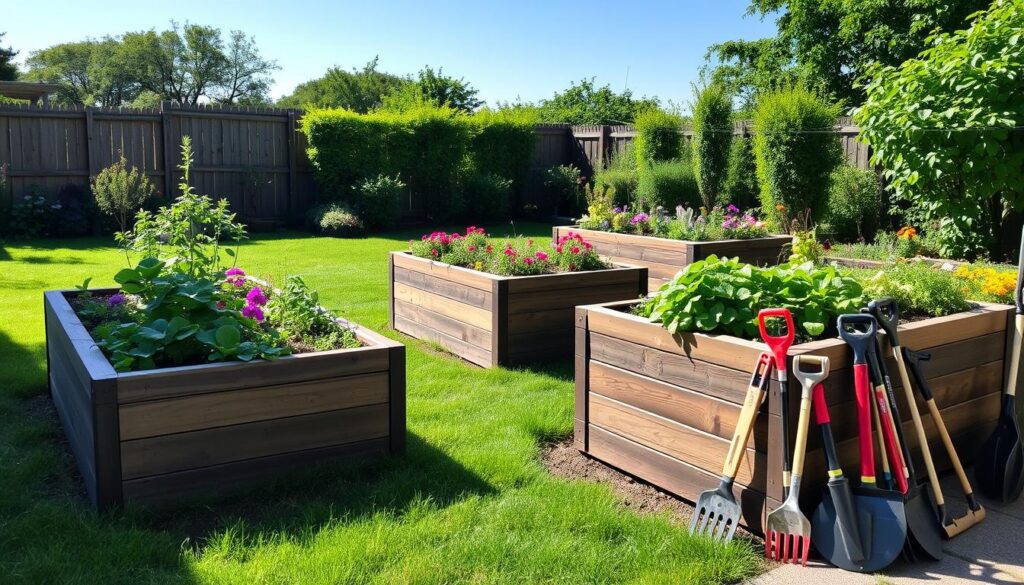
Maintenance Requirements for Longevity
To keep your raised garden boxes lasting for years, regular raised garden box maintenance is key. This means cleaning, pruning, and protecting them from the weather.
Looking after your DIY garden project is vital. It keeps your plants healthy and productive. With a few easy tips, your garden boxes will stay in top shape and give you a great harvest.
Seasonal Care Tips
- Clean your garden boxes often to stop debris and diseases from building up.
- Prune your plants to help them grow well and avoid overcrowding.
- Keep your garden boxes safe from too much rain or sun.
Wood Protection Methods
To keep the wood of your garden boxes safe, you can seal, stain, or paint them. These steps help stop rot, decay, and bugs. This way, your boxes stay strong and last longer.
By using these diy garden projects tips and doing regular garden box care, you can have a thriving garden for many years.
| Maintenance Task | Frequency | Importance |
|---|---|---|
| Cleaning | Weekly | High |
| Pruning | Monthly | Medium |
| Wood Protection | Annually | High |
Common Mistakes I Made (And How to Avoid Them)
As a DIY fan, I’ve found out that raised garden box mistakes can be really costly and upsetting. When I started my diy garden projects, I didn’t think about planning and doing things right. It’s key to follow garden box tips and best practices to avoid common errors.
Some common mistakes include not preparing the soil well, not having enough drainage, and picking the wrong materials. To avoid these mistakes, consider the following:
- Choose the right materials for your raised garden box, thinking about how durable they are and how easy they are to take care of.
- Plan for proper drainage and aeration to ensure healthy plant growth.
- Follow established diy garden projects guidelines and tutorials to minimize errors.
By learning from my mistakes and following these garden box tips, you can make a thriving and productive raised garden box. It will give you fresh produce for years.
Remember, a well-planned and done diy garden project can be rewarding and fun. Don’t be afraid to try new things, but also watch out for common raised garden box mistakes that can stop you from succeeding.
| Mistake | Consequence | Solution |
|---|---|---|
| Poor planning | Inadequate space and resources | Measure and plan carefully before starting your project |
| Insufficient materials | Structural integrity and durability issues | Choose high-quality materials and follow established guidelines |
| Inadequate maintenance | Reduced plant growth and productivity | Regularly inspect and maintain your raised garden box |
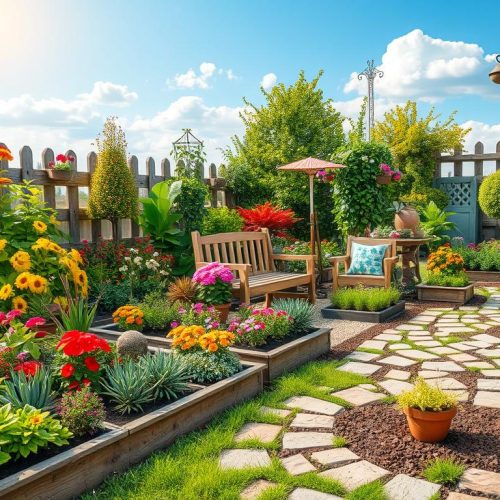
Conclusion: Growing Success with Your DIY Garden Boxes
Congratulations on starting your DIY garden boxes! You’ve followed a detailed guide to grow fresh fruits, veggies, and flowers. The secret to raised garden box success is in the planning and details we’ve talked about.
Whether you’re new to gardening or have experience, these tips will help. You can make a garden box that changes your outdoor area. From picking the right spot to building strong boxes and keeping soil healthy, each step is important. The joy of growing your own food is worth all the work!
Start your DIY garden project with dedication, patience, and a willingness to try new things. With creativity and the advice given, you’ll soon enjoy the fruits of your labor. Enjoy the journey and happy gardening!
FAQ
What are the benefits of building my own raised garden boxes?
Making your own raised garden boxes has many perks. It improves soil quality and drainage. This leads to better crop yields. You can also tailor your garden to fit your yard perfectly.
Building them yourself can save money too. This is compared to buying pre-made ones.
What factors should I consider when selecting the location for my raised garden boxes?
When picking a spot for your garden boxes, think about sunlight and drainage. Choose a place that gets enough sunlight. It should also drain well to help your garden thrive.
What materials do I need to build my own raised garden boxes?
You’ll need lumber, hardware, and fasteners to build your garden boxes. The exact materials depend on your box’s size and design. Don’t forget optional extras like irrigation systems and trellises to make your garden better.
What tools are required for this DIY project?
You’ll need various tools to build your garden boxes. This includes power tools, hand tools, and measuring tools. You’ll need drills, saws, hammers, and tape measures. Having the right tools makes the job easier.
How do I fill my raised garden boxes with soil?
After building your boxes, fill them with good soil. The right soil is key for healthy plants. I’ll give you tips on choosing the best soil and filling your boxes right.
What special features can I add to my raised garden boxes?
You can add features like irrigation systems, trellises, and pest protection. These make your garden more functional and pretty. They also make caring for your garden easier and more fun.
How do I maintain my raised garden boxes for long-term use?
Keeping your garden boxes in good shape is important. I’ll share tips on seasonal care and protecting them from the weather. I’ll also talk about how to keep your boxes looking great.
What are some common mistakes I should avoid when building raised garden boxes?
I’ve learned a few mistakes to avoid. These include bad planning, using the wrong materials, and not maintaining them well. I’ll share these mistakes and offer advice for a successful project.